Altered Board Book Ideas
Looking for ideas for making an altered board book?
Do you remember board books from your childhood? Perhaps your own children had, or possibly still have, a few of them? These sturdy and often colourful books for the very young still seem to be quite popular, and you may well be able to find some in your local charity shop (thrift shop).
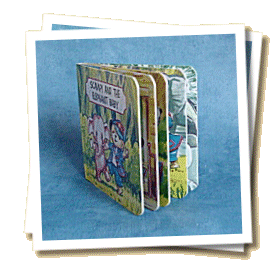
This is an account of how we altered a board book for a swap organised by the members of an artist trading card group with which we're involved. It's not intended to be a definitive list of instructions, because there's no right or wrong way to alter a board book, but perhaps it will give you a few ideas.
We found a set of board books, featuring a popular children's character, in a charity shop. Each book was 90mm (a little over 3½ inches) square, and about 8mm thick, and had five pages including the covers.
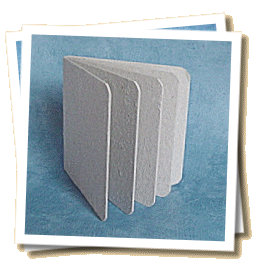
We started by stripping away the shiny paper surface of the book. The surface of this particular book came away quite easily, but if it doesn't you could try sanding it with a crafter's sanding block.
This second photograph shows the board book after the outer surface had been completely removed.
You may also be able to obtain undecorated board books at shops that stock altered art supplies.
Next we covered the entire surface with gesso, using an old credit card to spread it thinly and evenly. Gesso is a white material, similar to plaster, that accepts paint and inks easily. You can smooth it with your crafter's sanding block if you wish, but some artists prefer to leave it slightly rough.
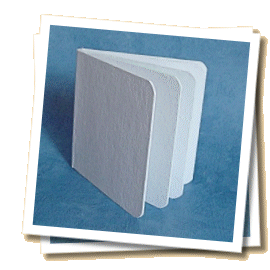
You should be able to obtain gesso at shops that sell artists' materials. It can also be found in more and more craft stores.
This photograph shows the board book completely covered with gesso.
Here's the fun bit…
Now we started to decorate our board book. Obviously if we were going to be able to close the book we couldn't use bulky embellishments on the inside. Because it was intended as a 'memory book' for the recipient to add her own memorabilia, we also didn't want to apply more than a minimal decoration to the inner pages.
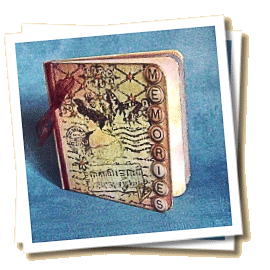
First we added colour by dabbing ColorBox® Cats Eye fluid chalk inkpads in various pastel colours randomly over the whole surface, using more on the outside covers to obtain a deeper shade.
We then dragged a gold pigment-based inkpad over the surface, inside and out, to add extra glitz and interest.
The next step was to stamp an image on the front cover using a StazOn® inkpad in Timber Brown. For this we chose a suitably-sized rubber stamp in a collage design from Great Impressions.
We gilded the edges by running along them with a gold Krylon® pen, embellished the image on the front cover by sticking on small gems, and added domed acrylic alphabet stickers to spell the word 'Memories'.
We completed this simple transformation by tying a maroon organza ribbon round the front cover near the spine.
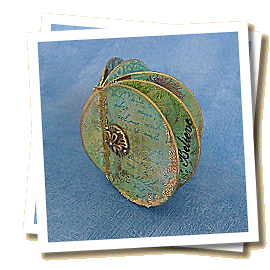
Here's another altered board book that we made for a different swap. This time everyone who took part was given a small round board book about 2¼ inches (57mm) across and about 6mm thick, again with five pages including the covers.
We started by stripping the book and applying gesso, in exactly the same way as we did before.
Again we used ColorBox® Cats Eye fluid chalk inkpads to apply colour randomly over the whole surface, and then we dry-painted with gold acrylic paint using a flat brush.
Next we stamped lightly all over with 'Old French Writing' by Hero Arts.
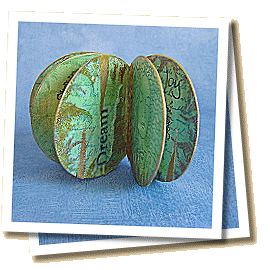
We decorated the inside pages of the board book using StazOn® inkpads in various colours and a selection of rubber stamps.
This time we chose a miniature mermaid and fern leaf from Claritystamp®, a 'Klimt Lady' from a cube by JudiKins, and word stamps, including 'Joy', 'Believe' and 'Dream', from a set by Technique Tuesday.
We then pasted in small strips torn from a sheet of gold tissue, and once more gilded the edges with the Krylon® pen.
Finally we embellished the cover of our altered board book by sticking on a small length of gold rick-rack braid, an antique gold coloured 'sand dollar' charm, and some gold microbeads.
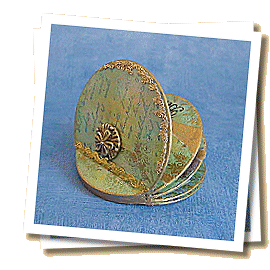
In these two examples we have looked briefly at some of the techniques that you may find useful when you are making an altered board book, and perhaps given you a few ideas.
What about… ?
Instead of adding colour by dabbing the surface directly with your stamp pad, why not use a small sponge to apply the ink from the pad? Acrylic paints also work well on this surface, and can be used to give additional texture.
You could also cover your board book partly or completely with pieces of fabric or paper, a readily available source for which is the multitude of designer papers intended for scrapbooking. These can be found in a wide variety of colours and designs. Look out for interesting textures and effects like old wood and distressed paintwork, or old manuscripts, books, music and maps. Alternatively, if you find old magazines, newspapers and books that nobody wants, why not use the real thing? You can cover the whole area with one piece, or with several different pieces torn into strips or mosaic shapes.
There is a wide variety of objects that you can use to decorate your board book. Unlike artist trading cards, which have to fit into a standard trading card sleeve, altered board books are not restricted to a maximum thickness. However, you can of course use the bulkier embellishments only on the outside, and even then these are perhaps better confined to the front cover, so that the book will still lie flat.
Some embellishments that you may like to try are:
- Printed or stamped images
- Torn papers or vellum
- Ultra-thick embossing enamel (UTEE)
- Polymer clay
- Paper clay
- Shrink plastic
- Friendly Plastic®
- Glass pebbles
- Keys
- Watch parts
- Bottle caps
- Coins
- Scrabble® tiles
- Dominoes
- Shells
- Postage stamps
- Tags
- Tickets
- Brads and eyelets
- Press studs (snaps)
- Decorative paper clips
- Buttons
- Beads
- Sequins
- Punchinella (sequin waste)
- Charms
- Gems
- Lace
- Fabric
- Ribbons and fibres
Some types of embellishment, like brads and eyelets, may be used both to decorate and to secure other items to your altered board book. You can also accent and add a three-dimensional quality to some of the flatter embellishments by covering them with Glossy Accents™, which dries to a hard, clear finish.
We hope that we have given you a few ideas, and maybe inspired you to try making your own altered board book.
Why not give it a go?
Altered Art Home » Altered Art » Altered Board Book Ideas


Enjoyed your visit? Why not leave a comment?