How to make
Fabric Artist Trading Cards
Are you a keen textile artist looking for something different? Why not try your hand at fabric artist trading cards? Whether you're a beginner or an expert, we’ll tell you what you need to know.

If you've read our description of how to make artist trading cards (or ATCs) you'll know about the terms and techniques that are used. Although some of the same techniques can be used when you make fabric artist trading cards, there are a number of differences, particularly in the way that they are constructed.
The most obvious difference is, of course, that they are made mainly from fabric. It is a generally accepted rule that fabric should constitute about 90% of the whole, the remaining 10% consisting of non-fabric embellishments.
You will need some material for the front of your artist trading card. This will form the background of your design, and can be fairly plain to allow your focal point to stand out, or its pattern may form a major part of the design.
You can, of course, start with a plain fabric, and decorate it yourself with paints, fabric dyes, rubber stamps etc.
The middle layer is usually made from some thick interfacing material like Peltex, Timtex or Vilene pelmet interlining. This will make your ATC stable, and give a quilted effect when you sew through it. You could also use felt, or a layer of cotton or wool wadding.

The last layer is a plain cotton on which you can write the details of your artist trading card with a waterproof pen. An alternative is thin card that you can sew through. We would recommend this if you’ve used felt or batting as your middle layer, as it will give your ATC more stability, although purists would insist that cardstock should not be used to back a fabric artist trading card.
Cut your material about ½" longer and wider than the standard artist trading card size of 2½ by 3½ inches (64mm x 89mm) to allow for trimming the edges neatly at the end. Remember to centre your design, so that there is about ¼" to be trimmed all round.
If your interlining doesn’t already have an iron-on adhesive, use Bondaweb or something similar to fuse the materials together.
Bond your background material to your chosen middle layer. If you wish, you can add texture by decorating with lace or braid.

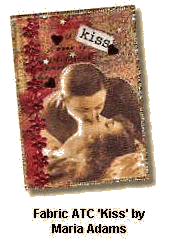
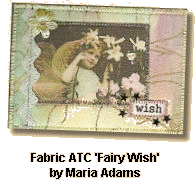
Add your focal point, which could be fabric, an image printed onto fabric or perhaps a three-dimensional element. Examples of suitable objects include buttons, pieces of embossed metal, and castings made from polymer clay or ultra-thick embossing enamel, often abbreviated to UTEE. Maria prefers to sew these on whenever possible.
Bear in mind when you make fabric artist trading cards, as with any other ATCs, the requirement of most swap groups that they are thin enough to fit in a standard trading card sleeve. This means that if you do include three-dimensional elements you will need to choose examples which are not too bulky.
Add any further embellishments that you wish to use. Although many of the embellishments that are suitable for artist trading cards in general may be used, those most commonly found on fabric artist trading cards are:

- Printed or stamped images
- Brads and eyelets
- Buttons
- Beads
- Sequins
- Punchinella (sequin waste)
- Charms
- Lace
- Ribbons and fibres
If you are using an ATC back stamp, now is the time to apply this to your backing material. Use a suitable pigment-based ink pad like Crafter’s Ink, Fabrico or VersaCraft, which should be heat-set by ironing your fabric.
Bond this layer to the front and middle layers. Trim your card to the standard ATC size of 2½ by 3½ inches (64mm x 89mm), and finish the edges, either by machine using zigzag or satin stitch, or by hand with a buttonhole stitch.
Complete your fabric artist trading card by filling in the details on the back and adding your signature.


Enjoyed your visit? Why not leave a comment?